Barn Door DIY | How to Turn a Regular Door into a Showstopper
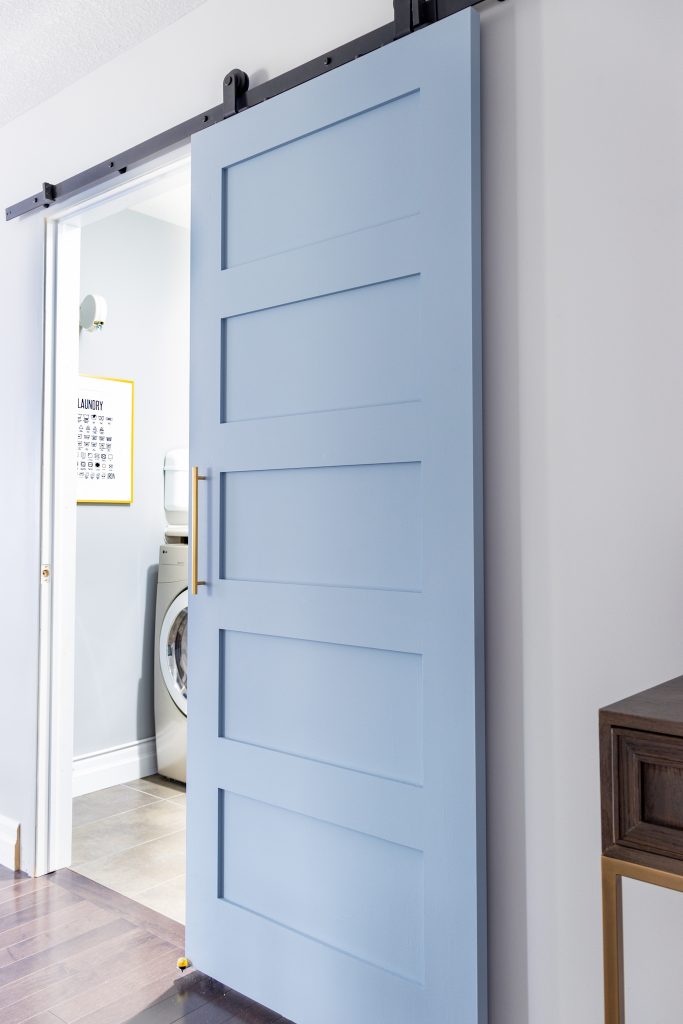
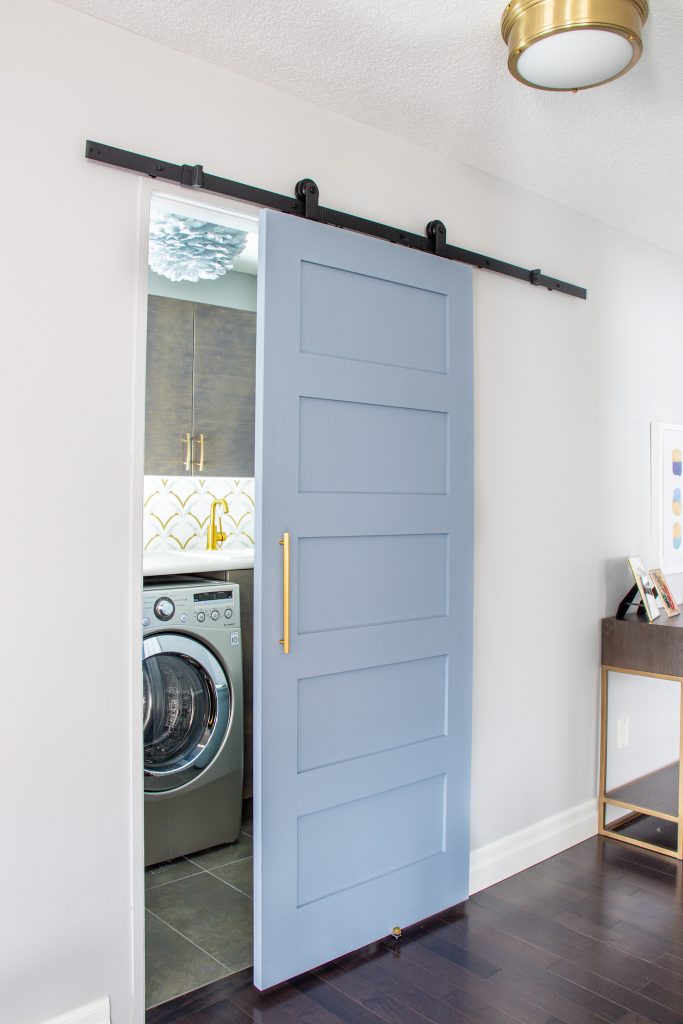
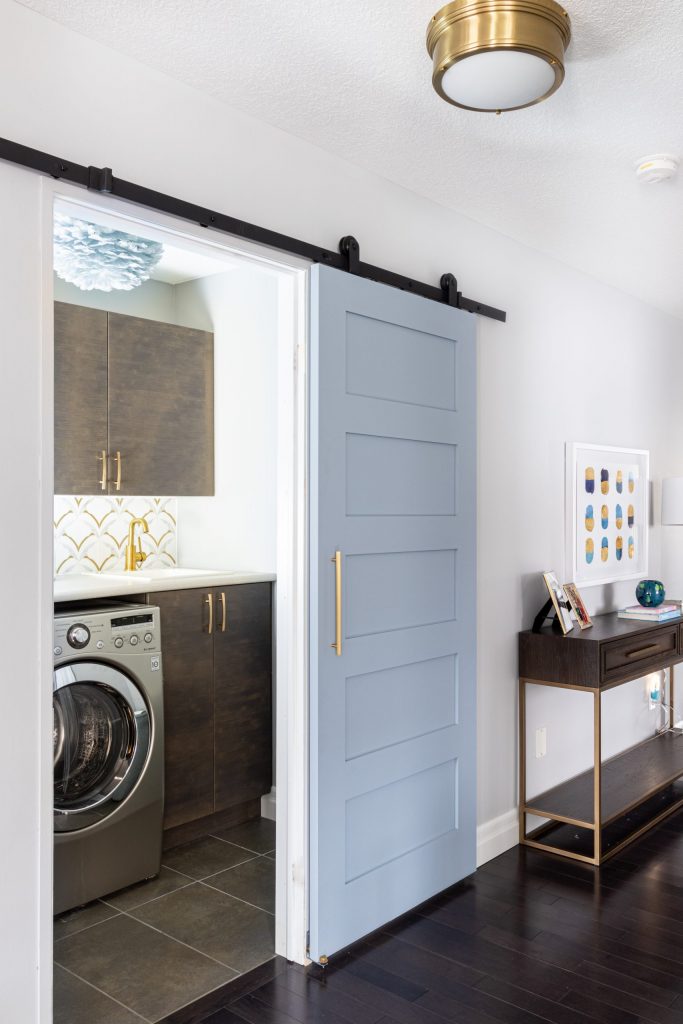
Hi all! Recently we gave our laundry room a quick makeover (coming up in a later post), including updating the door. The laundry room is on the second floor, and the original door opened outwards into the hall. Not very practical or space saving, actually not very cute either! A DIY barn door was the answer.
If you’re like me and can’t stand a life story (I’m looking at you recipes, even though I totally get it), skip down to Instructions.


**Contains Affiliate Links** As an Amazon Associate I earn a small commission from qualifying purchases.**
Planning
This was our first time installing a barn door, and we dove in thinking “how hard could it be?” Well pretty much right away we faced some decisions we had to make upfront.
Barn Door or Wannabe Barn Door
So apparently I was under the impression this was a one day or so job, which consisted of going to Home Depot and picking up a barn door. However, when I was looking at the various barn door kits that come in standard sizes, the doors seemed big with really chunky mounting hardware. Something like this Barn Door Kit was what I was originally looking at. Looks so nice, but not for our space.
Anyways we came back empty handed, so sad I wouldn’t have a barn door that very second.
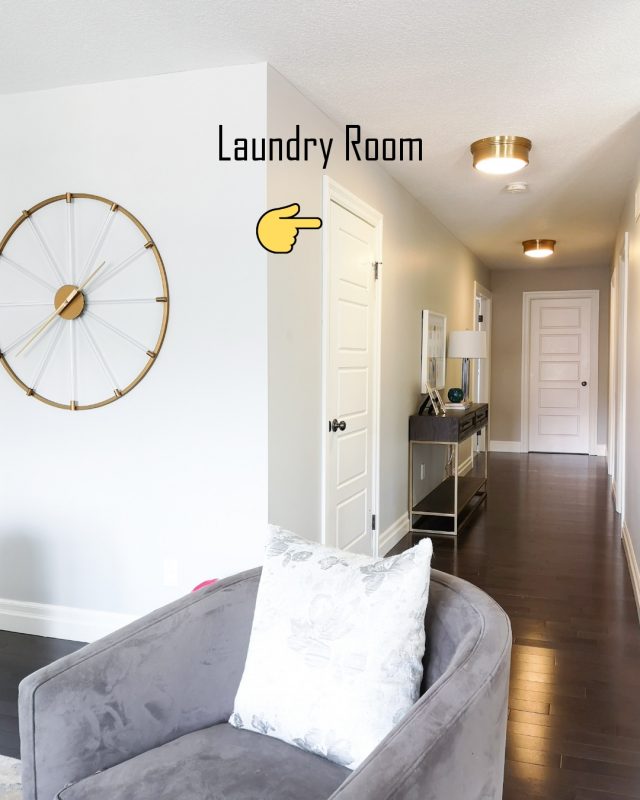
So here’s the dilemma with the large doors. Our laundry room being on the second floor and the door opening into the main hallway, it’s the first thing you see when you come up the stairs. For that reason, I didn’t want a door that was too large or would look overpowering for a hallway.
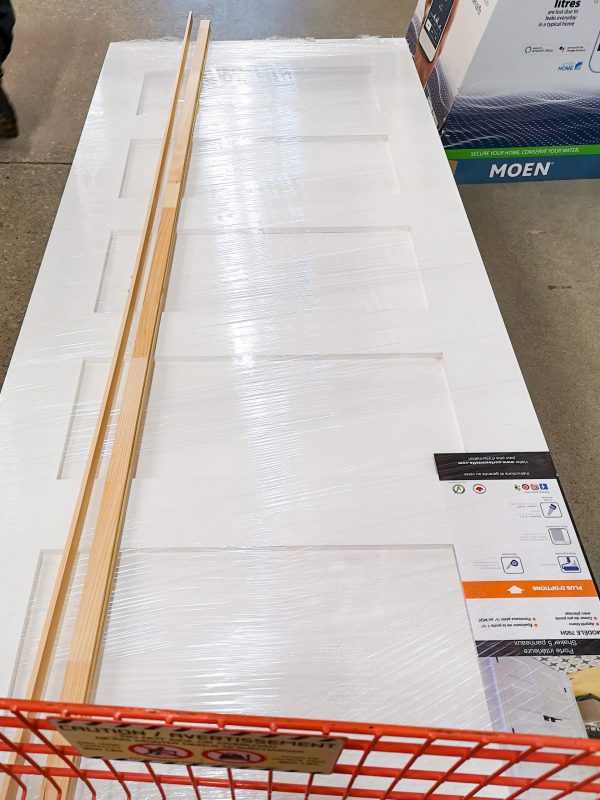
That led me to look into the “wannabe barn door” option. I decided on getting a regular boring 36″ x 80″ paneled door slab, and turning that it into a “barn door. When considering your own space, remember you can convert any door slab into a barn door. For me having the door go with the rest of the look of our space was important.

To Trim or Not
The other decision that determined our door size was the door trim. Once we took the existing door off the hinges and lay it against the door, the trim looked a little funny. Since we were going with a smaller door, the door looked like it was framed.
As you know I love creating extra work for my husband. He all along was like, get the standard barn door kit from Home Depot, we won’t have to take the trim off, I was more nahh. So those pieces of stick you see, that’s the new trim. (More on this in Trim Section under Instructions).
If you DO go with a standard barn door, you probably don’t need to worry about the trim and leave the existing frame. A larger door would cover the framing completely.
Barn Door Mounting Hardware – So Many Options so Little Husband Patience
Finally, making the decision on the barn door track & mounting hardware. Ideally I was looking for a beautiful brass finish look. I mean come on now, they are just so stunning. However, who would have thought trying to complete a DIY project during a pandemic would be so tricky. Like this one below that wasn’t able when I was looking.
My search online wasn’t ideal, as I was struggling with stores that had limited inventory and shipping delays. Finally, when I did find a gold one online, the cost of shipping to get it here from the US was astronomical. I was also worried about the size and finish of the hardware, as I didn’t want something that was too overpowering.
Needless to say, I obsessed over the mounting hardware for DAYS, yes DAYS before settling on a simple black one (I know after all that). During those dark days my husband was forced to listen to my one “track” mind 24/7. To say he tuned me out after a while wouldn’t be a lie. Anyways I thought if the black didn’t work a simple spray paint in brass would do the trick.
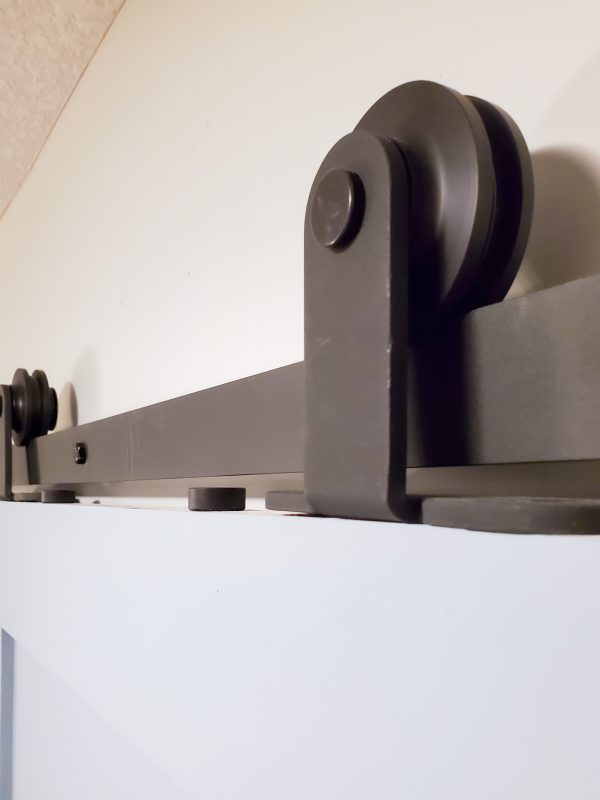
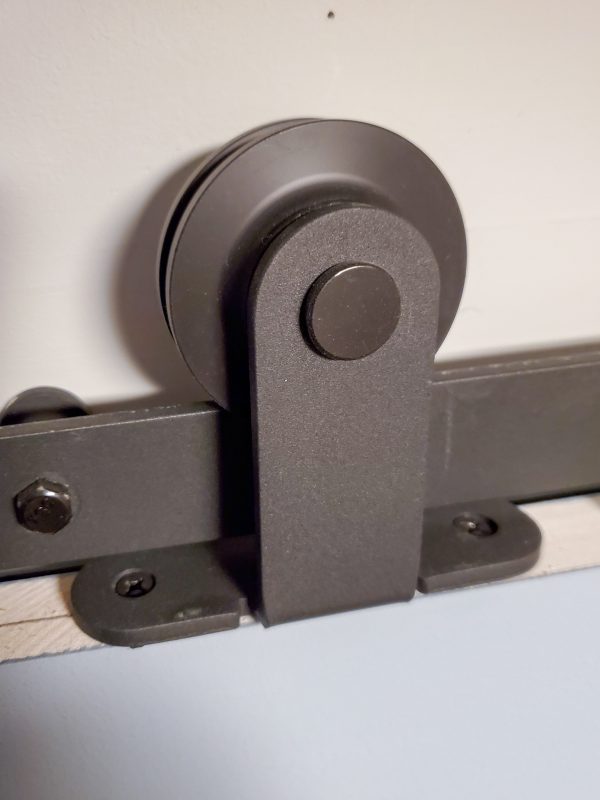
One other thing on the mounting hardware, is the wheel mount. The one I did settle on, mounts on top, because I didn’t want to see too much of the hardware from the front of the door. This black hardware kit utilizes the more common and popular mechanism.
You see I wanted a barn door without too much of a barn-y look. I know I know I’m totally seeing the problem.
Turning a Regular Door Into A Barn Door Instructions
Tools
- Leveler
- Hammer
- Ratchet
- Drill
- Philips Screwdriver
- Paint Brush
- Stud Finder
Supplies for Barn Door
- Shaker Door
- Track & Mounting Hardware Kit
- Brass Door Handle
- Paint
- Floor Guide (optional we made our own)
Supplies for Floor Guide (optional)
- One 3″ Corner Brace
- Two 7/8″ Screw on Bumpers
- One 1/2″ Rubber Washer
- Screw and Washers
Taking Measurements
Before we start any project, we measure, measure and MEASURE.
- Measure the opening the of the doorway to determine your door size. If it’s a large opening you’ll have to make sure the door you pick has at least a few inches clearance from top to bottom of the trim. Basically make sure the door is bigger then the opening.
- We went with a 36inch x 80 shaker door slab to go with the rest of the doors on the second floor.
- Measure for trim (if you’re removing the old one).
- We went with a small 1- 1/16 inch trim.
Paint the New Door Slab
So as things go, I basically sat and stared at the below chips for quite some time. When my eyes started to blur and see “blue”, I picked one and called it a day.

We went with Benjamin Moore Little Falls, and oh my it’s such a beautiful soothing blue gray. Love it! Phew!


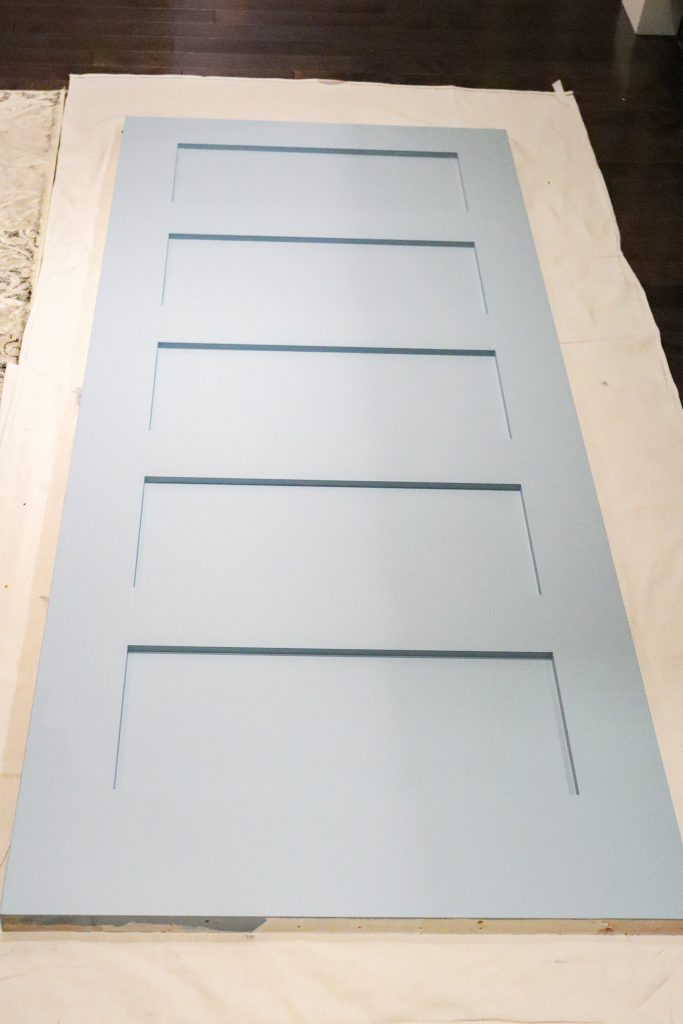
To paint the door, I lay it down on one side and first used a paint brush and painted all the edges. Then with a small roller I painted the rest of the door.
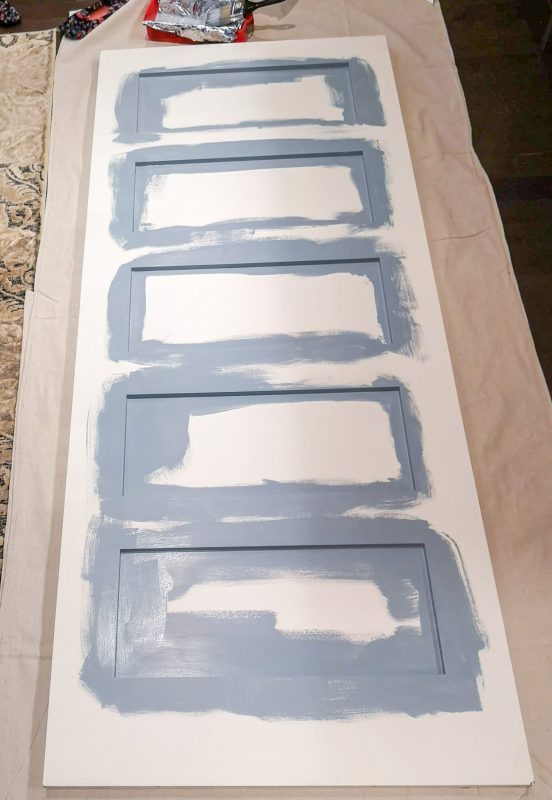
Once the one side is done, let it dry and repeat for the other side.
Removing the Existing Door/Trim
Next remove the existing door from the hinges. Simple no issues.
We then took out the trim around the door. Not so simple, some issues.
Read on or skip trim section if you don’t need to add trim.

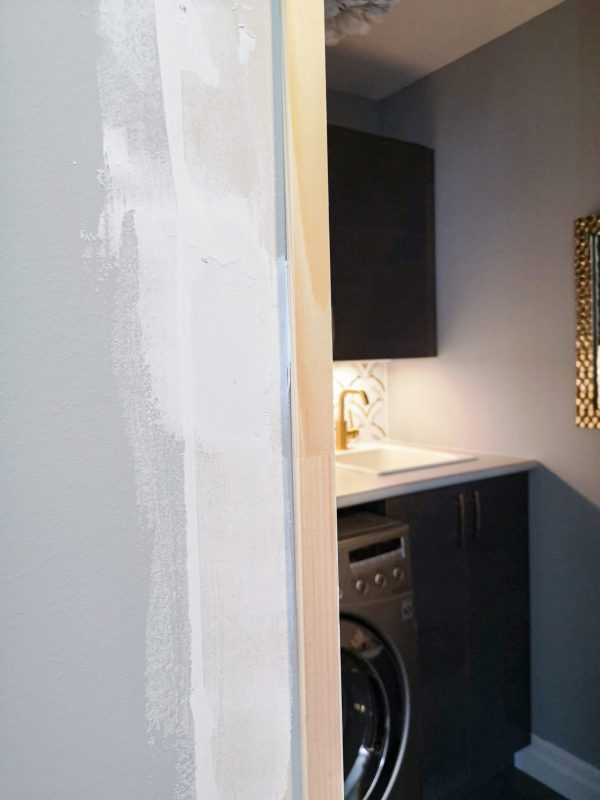
Add Trim if You Need To, We Need To
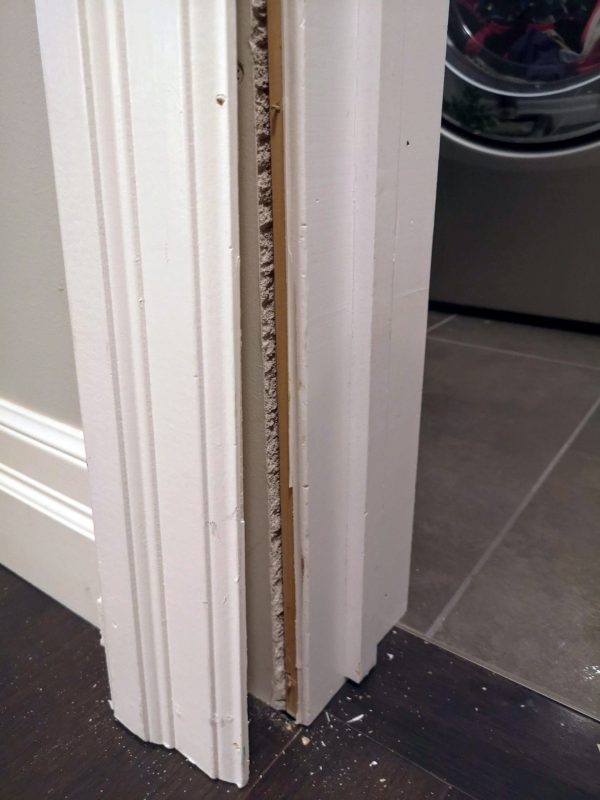
There was a gap between the drywall and frame of the door that the orginal trim was hiding. You could just patch the gap with spackling, however adding a bit of a border trim would look more finished.
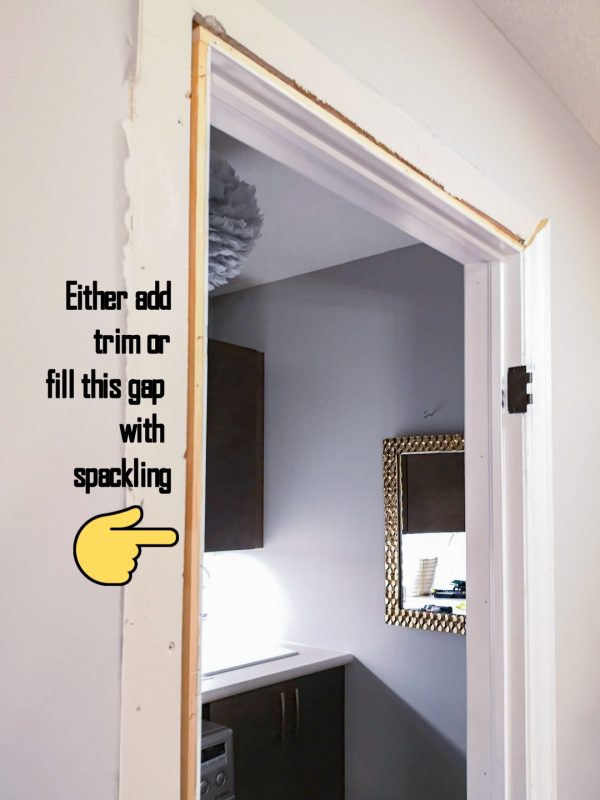
We used the thinnest trim (5/16 x 1-1/16 x7ft) we could find..
- First we cut the 4 pieces of the trim, based on the measurements for the top and sides using a jigsaw.
- Using butt joints, we then glued and nailed in the trim.
- Next use dry wall spackling to cover the trim joints. Apply a thin even layer to make sanding easier.
- Once dry, the spackling was then sanded. We repeated this step a second time to ensure the joints looked seamless.
- Paint the trim.
Install Barn Door Tracks
Measuring Where the Tracks will be Hung
Once the trim was done, it’s time to hang the track rail. Start by taking measurements of course.
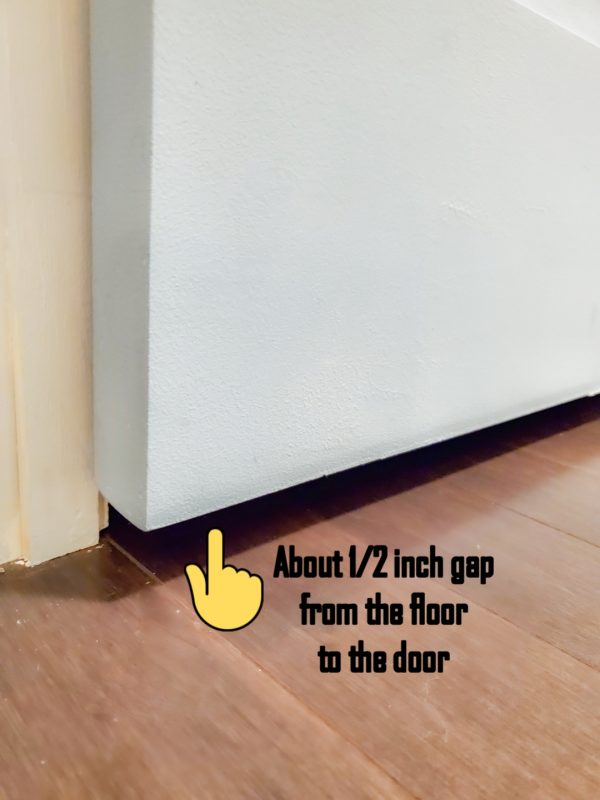
- To ensure there is enough clearance from the bottom of the door to the floor (and keep the gap at a minimum), we held the door in place where we wanted it. (You do NOT want the door to be hitting the floor).
- If you’re working alone then measure the door and wall both.
- Mark the top of the wall. This would be approximately where the door would be going.
- Now that you know where you want the top track to be hung, using a stud finder mark where the studs are.
- The rails should be attached to at least 2 studs, to make sure the door will be held up securely.
- Once you find the studs, mark them in place.
- Next, pre drill the holes that you marked.
Now the walls are ready for the track to go up.
*** We got lucky with our studs, as they aligned properly to where we needed them. If you don’t find enough studs to nail into, you would have to add a support header first. Such as a 1 x 4 inch mdf board, and screw the tracks into that.***
Hang the Tracks to the Wall
- Then screw in the track with the bolts using the ratchet.
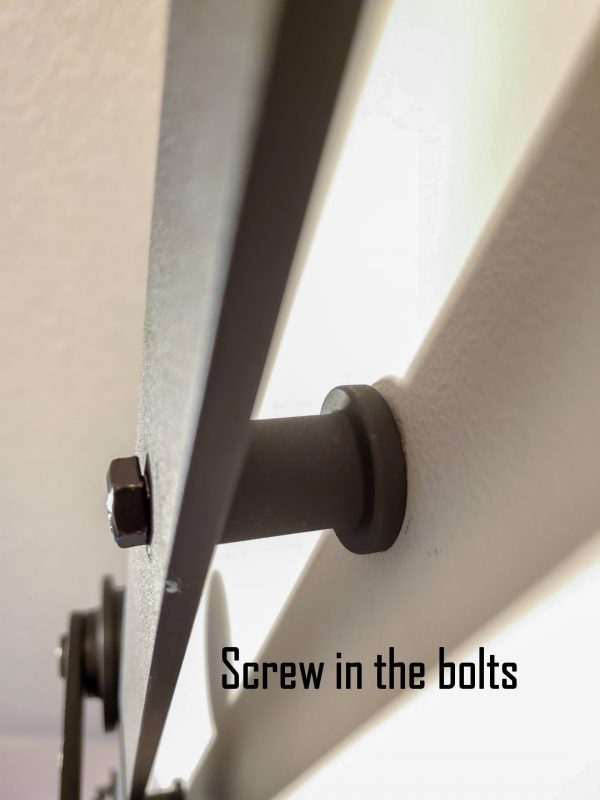
- Tip – screw in a bolt at one end, and then using a level make sure the rail is straight and screw in the other bolt. This part must be done perfectly, so even if its marked in place, use the level at this point again.
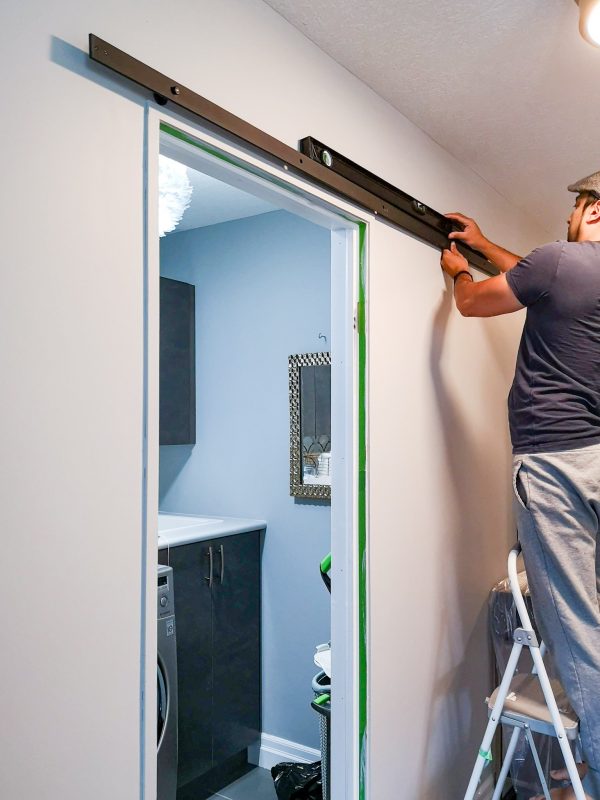
- Once the bolts with the track railing are in place at both ends, continue with the rest of the bolts.
Attaching the Wheels to The Door
- Mark where the wheels would be screwed in on top of the doors. This can be done depending on the door size. We went about a quarter of the length of the door on each side.
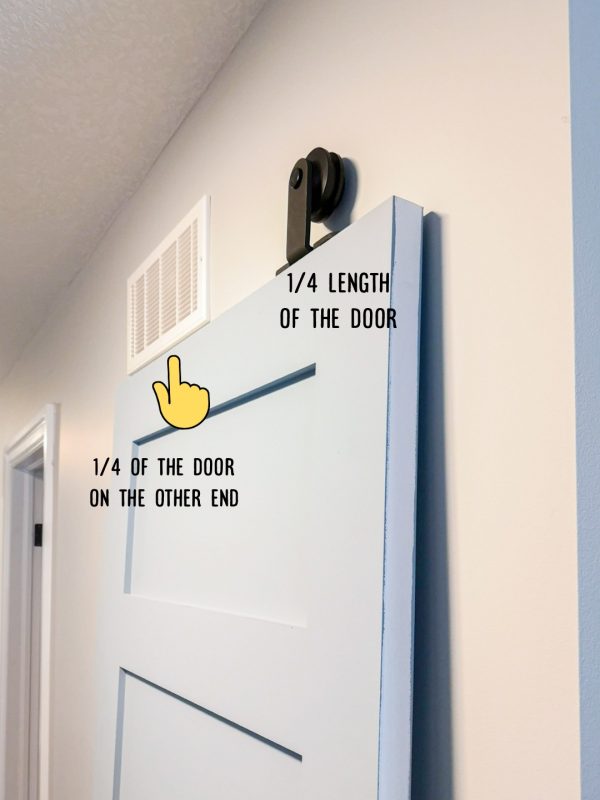
- Pre drill in the holes, as per your markings.
- Screw in the wheels on each side.
- The door is now ready to be hung! Yay we’re about to have a barn door!
Carefully Hang the Door
- Lift the door up above the rails, and align the wheels until they sit on the track. Yes!!

- Now the fun part! If everything is aligned properly, you should be able to slide the door side to side. However don’t get too excited, STOP SLIDING. READ NEXT.
- Be careful not to push the door too far or the door will slide off the rails! We almost did this.
Install Door Stoppers (included in track kits)
- Determine how far you want the door to slide open and close.
- Then slide in the stopper on each side of the track until it hits the wheel assembly. That is how much the door will open, you can adjust this as well.


- Tighten the stoppers.
And with that my friends a regular door is now a sliding barn door. Handles and one more important thing left.
Barn Doors Can Sway Outwards, This was An After Thought – Please READ
So once the door was up, we thought all we had left to do was the handle. However, my 2 year old came running, grabbed the door and pulled it towards her, let’s say I had a minor heart attack. I thought the door was going to come right off the hinges.
A lot of track kits don’t actually come with a floor guide too keep the door from swaying back and forth.
You can purchase these floor guides, or you can assemble one yourself. We went with the latter.
The following materials is what you need.
- One 3″ corner brace
- Two 7/8″ screw on bumpers
- One 1/2″ rubber washer (in between the bumper and brace)
- Screw and Washers (not shown)
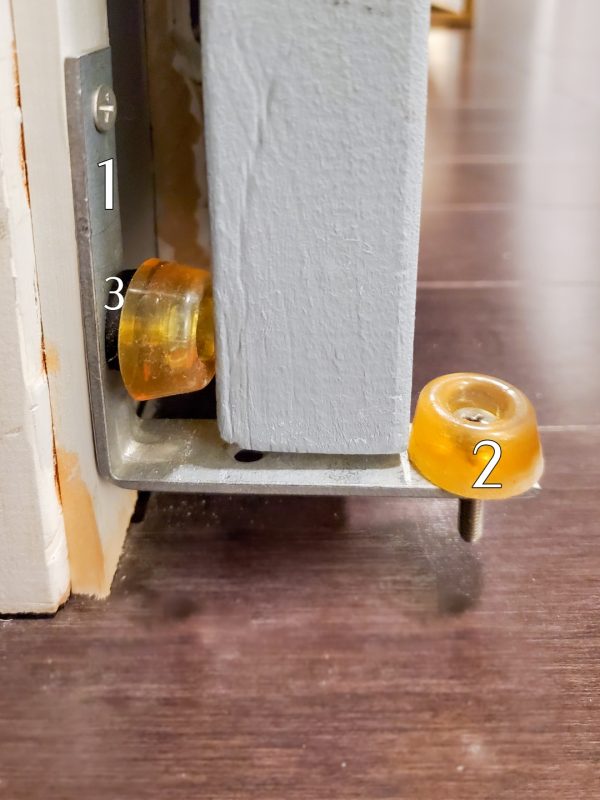
Instructions to DIY a floor guide
Numbers coordinate with above pic.
- Screw the corner brace to the bottom right side of the door way.
- Now screw in the bumper using the screw, nut, and washer.
- Take the 2nd bumper and a rubber washer, and screw them into the brace facing you. (See picture above it will make sense).
- This will prevent the door from hitting against the wall. Use a leveler to ensure the door is level.
The door is now in place securely, and can safely be opened and closed.
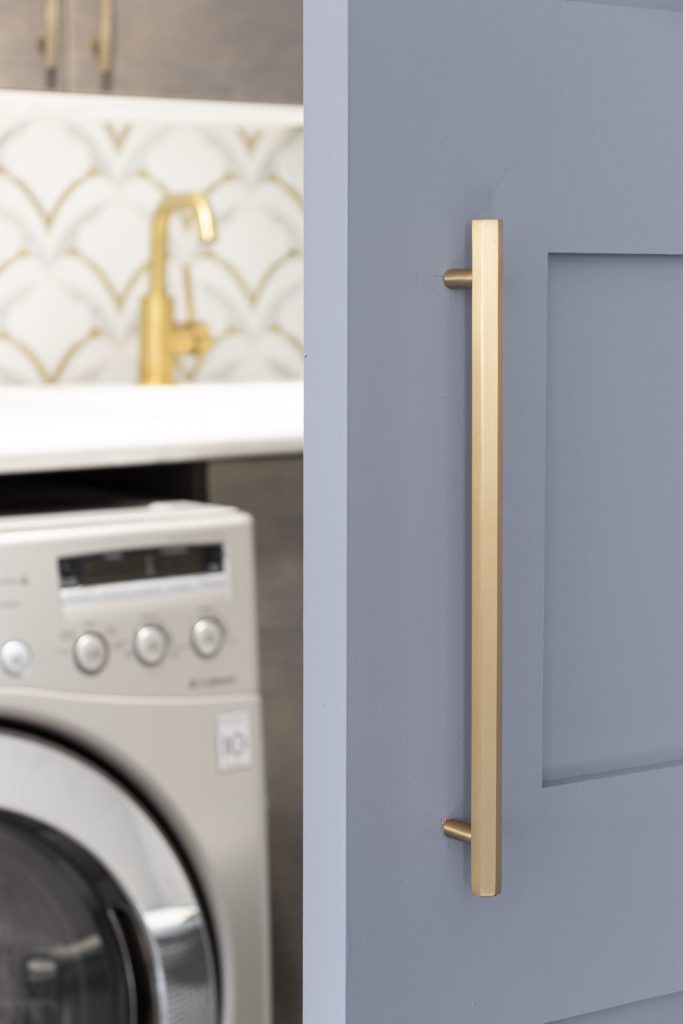
Finally Install an Eye Catching Handle
The last thing to do is install your door handle. Because of the lockdown finding a proper barn door handle was pretty impossible. I ended up purchasing a large cabinet handle and using that. Worked fine and no one is the wiser (except you all). I did find this, Brass Handle when writing this post that would work great.
Phew! That was one long DIY but I promise once you’re prep is done it took us a day!
Leave me any questions you have and take a look at my other posts as well, we recently gave our Powder Room a weekend refresh.

7 Comments
delta 8 gummies peach rings · July 13, 2021 at 4:07 am
Greate article. Keep writing such kind of information on your site.
Im really impressed by your site.
Hello there, You’ve performed a fantastic job. I’ll definitely digg
it and personally suggest to my friends. I’m sure they’ll
be benefited from this web site.
Alexandra · November 14, 2021 at 11:49 am
I love the look of this door, but have to ask, what kind of hardware did you use on the inside of the door (to get out of the laundry room). We will be installing a barn door soon, and we are having trouble coming up with an idea to open the door from inside the room.
Basalat · November 14, 2021 at 12:13 pm
Hi there, thank you so much! Soooo we don’t actually ever close the door from the inside of the laundry room. Only the outside, so I didn’t bother installing anything. Having said that, it’s fairly easy to just slide it open, the handle was more decor for us :))
Jaimie · January 9, 2022 at 7:41 pm
Great article! We’re looking to do those for a couple of closet doors. How much smaller was the barn door than the door you removed? I was thinking a barn door would need to be bigger, so I’m a bit confused! Thanks so much!
Basalat · January 9, 2022 at 10:51 pm
Hi there Jaimie, thanks for the feedback! So we actually just used a regular door slab, it was the same size as the door we removed, except didn’t have the holes from the hinges. The regular door has nothing predrilled so looks clean. Let me know if that makes sense! You can also DM on instagram @homewithb.com, good luck!
pau max duro · October 18, 2021 at 1:19 pm
… [Trackback]
[…] Here you can find 94731 more Info to that Topic: homewithb.com/2021/01/barn-door-diy-how-to-turn-a-regular-door-into-a-showstopper […]
Glo Carts · October 19, 2021 at 6:09 pm
… [Trackback]
[…] Find More here to that Topic: homewithb.com/2021/01/barn-door-diy-how-to-turn-a-regular-door-into-a-showstopper […]